

3.3 Circuit Connection
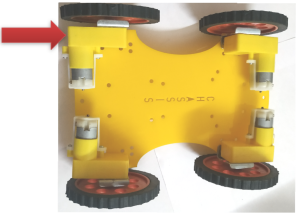
2. Now, connect the components and make the robot assembly as instructed in the chapter-5.
Note: Take the chassis and connect the motor clip with the Chassis then connect the motors on the clips.At the last attach the wheels as shown:
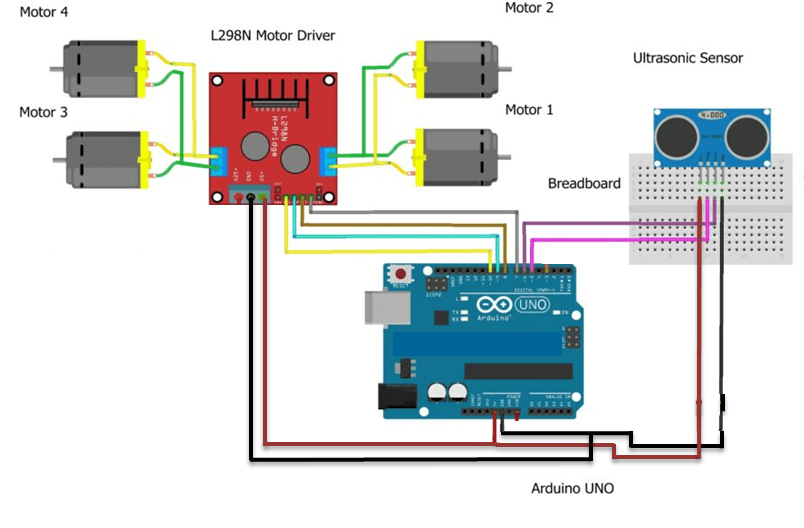
3. Now, connect ultrasonic sensor with Arduino Uno.
As, ultrasonic sensor have 4 pins:
- VCC
- Trigger
- Echo
- GND
4. Connect the VCC of ultrasonic sensor with the +5V of Arduino Uno.
5. Connect the GND of Iultrasonic sensor with the GND of Arduino Uno.
6. Connect the Trigger pin of ultrasonic sensor with any of the digital of Arduino Uno. Here,I am connecting it with digital pin 5.
7. Connect the Echo pin of ultrasonic sensor with any of the digital of Arduino Uno. Here,I am connecting it with digital pin 6.
8. Now, connect all the 4 motors with Motor driver:
S.No. | MOTOR DRIVER | MOTORS |
1 | OUT2 of Motor terminal 2 | Positive of Motor 1 and 2 |
2 | OUT1 of Motor terminal 2 | Negative of Motor 1 and 2 |
3 | OUT4 of Motor terminal 1 | Positive of Motor 3 and 4 |
4 | OUT3 of Motor terminal 1 | Negative of Motor 3 and 4 |
9. Next, connect the motor driver with Arduino Uno:
MOTOR DRIVER | Arduino Uno |
IN1 | Digital Pin7 |
IN2 | Digital Pin8 |
IN3 | Digital Pin9 |
IN4 | Digital Pin10 |
5V | +5V |
GND | GND |