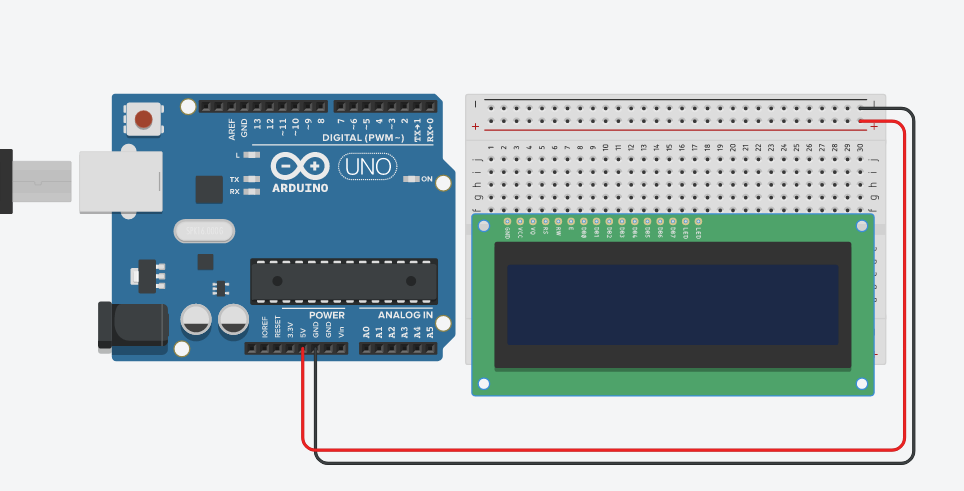
Circuit Connection of LCD with Arduino Uno
Lesson-16 ->Introduction to LCD(Liquid Crystal Display).
Circuit Connection of LCD with Arduino Uno
Let’ learn to interface LCD with Arduino Uno.
1. Open the default screen of tinkercad circuit designing.
2. Now, search for Arduino Uno in the search bar and then drag and drop it in the “designing area”.
3. After this, Drag and Drop all the required components in the
“designing area”
.
Components Required:
Arduino UNO
LCD
Breadboard
Note : Connect +5V of Arduino Uno to positive rail of breadboard and GND to negative rail of breadboard
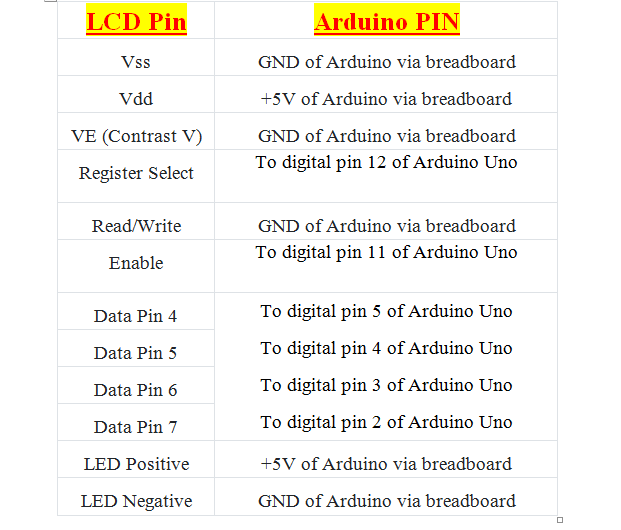
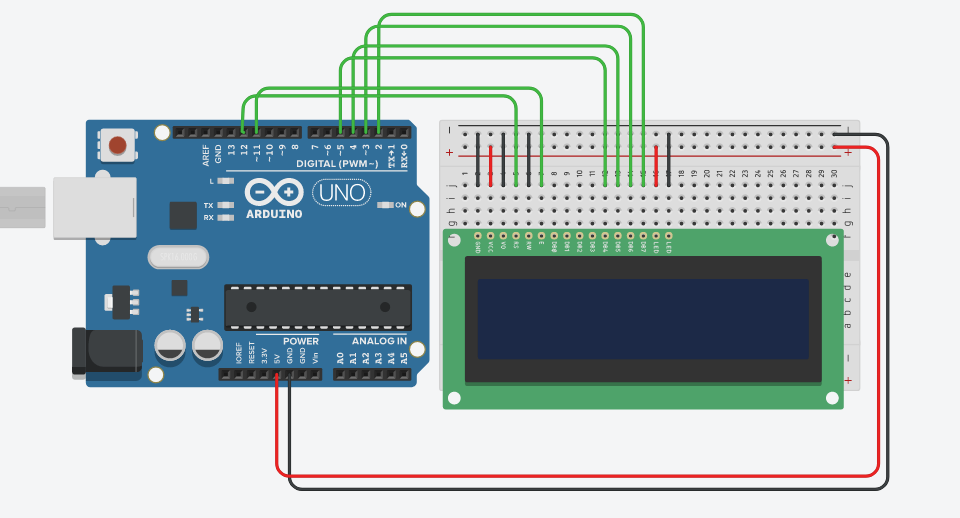
4. Now, connect LCD with Arduino UNO according to the Pin connection and circuit diagram given below:
Back to Lesson
Login
Accessing this course requires a login. Please enter your credentials below!
Username or Email Address
Password
Remember Me
Lost Your Password?
Register
Don't have an account? Register one!
Register an Account